Reverb plugins hand you a preset list and a mix knob. What they hide is the tail itself, which is the only part that decides whether a throw sounds like a room or like someone else’s record. VESSEL makes the tail the thing you edit, then gives you the file so the space belongs to you afterwards.
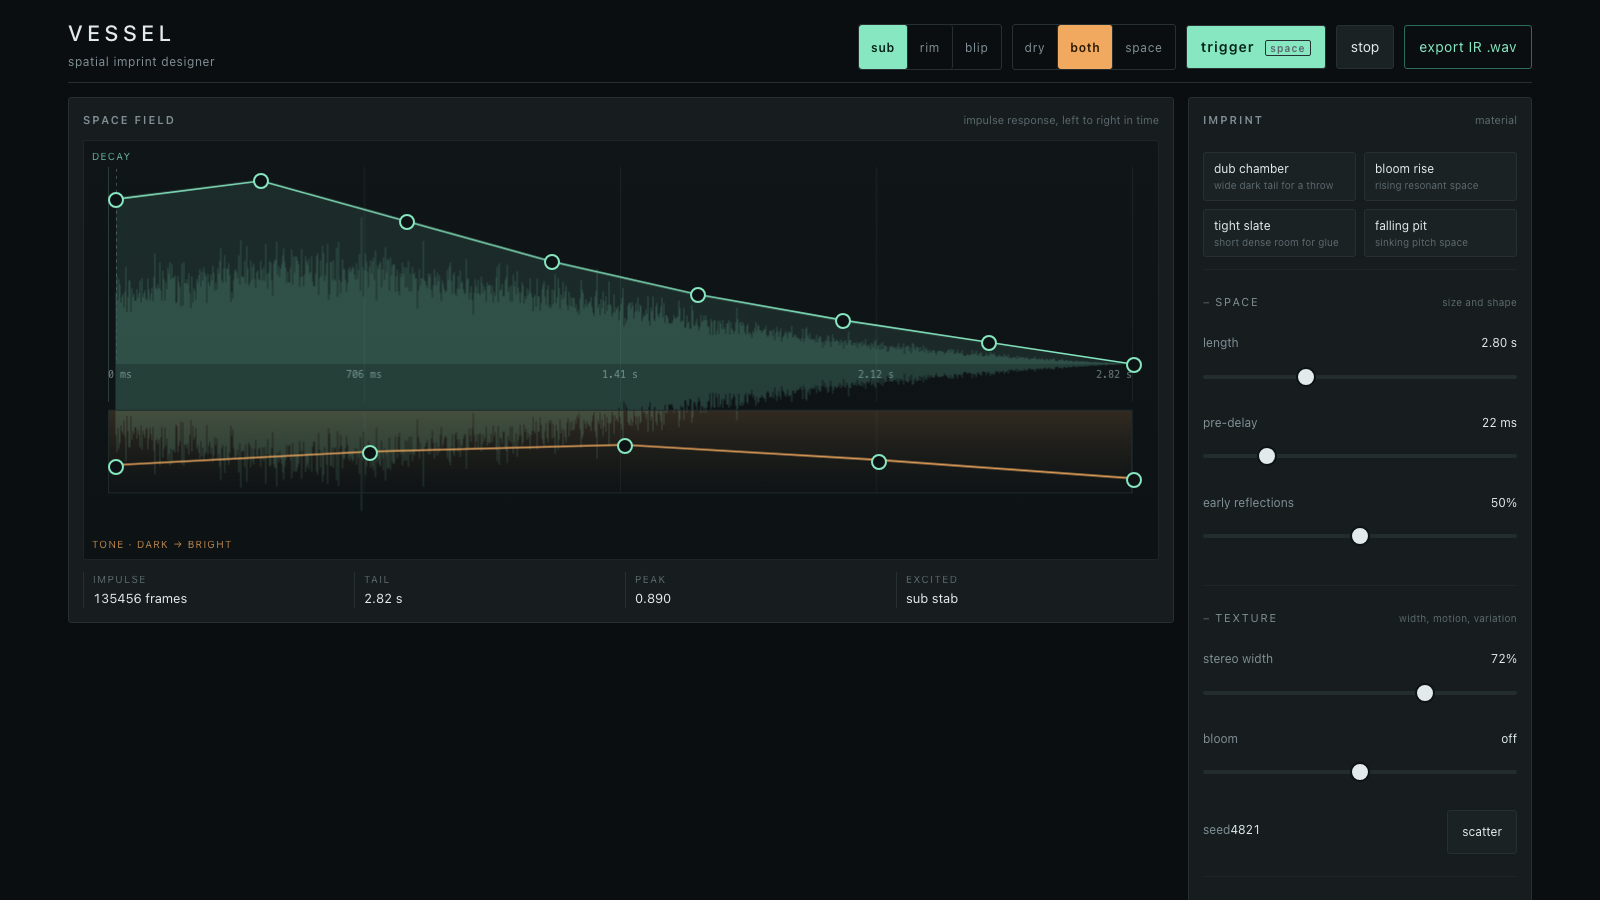
The field holds two direct-drawn lanes. The upper lane is decay: eight points you drag to shape how the space falls away, with the actual generated impulse drawn behind the curve so the drawing and the data stay the same object. The lower lane is tone, five points that walk the tail from dark to bright, so a space can open up as it dies or close into the floor immediately.
Between them sit the decisions that make a space recognizable. Length sets the tail in seconds. Pre-delay pushes the envelope away from the transient. Early reflections add discrete taps that give the space a physical size, and scatter reseeds their pattern. Stereo width collapses the two channels toward a shared mid or spreads them apart. Low cut and high cut decide what the space passes, which matters more than any decay curve when a sub is involved.
Bloom is the one that changes the character. A positive bloom walks a resonance upward through the decay, so a hit leaves behind something rising out of it. A negative bloom sinks the same resonance, which is the transition sound for a drop that falls away before it lands. It is written into the impulse, so the pitch movement survives being loaded into any host.
Four starting spaces cover the usual jobs. Dub chamber is a wide dark tail for a snare or vocal throw. Bloom rise climbs while it decays. Tight slate is short and dense for gluing a drum bus. Falling pit sinks. Every one of them is a state you can then pull apart, and scatter will find something else in the same neighborhood.
Audition is native and honest. Trigger places the dry source into the space, and the monitor switches between dry, space, or both on parallel paths so you hear the difference instead of guessing. The convolver runs on the exact samples that get written to the file, which is why the export is the sound you just heard rather than an approximation of it.
Export writes a stereo 48 kHz PCM WAV. Drop it into Ableton’s Convolution Reverb, any IR loader, or a sampler, and the space is yours to reuse with dry/wet where it belongs. Save a recipe next to a finished track to recall the exact space later.
Nothing leaves the browser. The impulse is generated from a seeded noise cloud and your curves, so the same recipe renders the same bytes every time.